On this page
Self-Hosting with Headscale
Aircast reaches your device over a tailnet: a private WireGuard mesh coordinated by a control server. By default that's Tailscale's hosted coordination service. If you'd rather own the whole path, point the device at your own Headscale server instead. No Tailscale account and no third-party coordinator, just your control plane and your devices.
Before you start
- A small always-on host with a public IP or DNS name for Headscale (a $5 VPS is plenty, since it carries control traffic, not video).
- A domain with HTTPS for the control server. Headscale clients require TLS; terminate it with Caddy, a reverse proxy, or Headscale's built-in ACME.
- An Aircast device already flashed and reachable on your LAN, see Aircast.
Throughout this guide, replace https://headscale.example.com with your own control server URL.
Set it up
Deploy Headscale
Headscale reads its config at startup, so create the data and config directories first. Grab the example config and set server_url to your public URL:
mkdir -p ./config ./data
curl -fsSL https://raw.githubusercontent.com/juanfont/headscale/main/config-example.yaml \
  -o ./config/config.yaml
# edit ./config/config.yaml → set: server_url: https://headscale.example.com
Then start the container, mounting both directories:
docker run -d --name headscale \
  -v ./config:/etc/headscale \
  -v ./data:/var/lib/headscale \
  -p 8080:8080 \
  headscale/headscale:stable \
  serve
Front it with HTTPS so it's reachable at https://headscale.example.com, Headscale clients require TLS. Verify it's up:
curl -fsS https://headscale.example.com/healthSee the Headscale documentation for the full config reference and reverse-proxy examples.
Connect the admin panel
Everything from here on happens in headscale-admin , a web UI for users, pre-auth keys, and nodes. Run it next to Headscale and serve it from the same domain under /admin:
docker run -d --name headscale-admin \
  -p 8000:80 \
  goodieshq/headscale-admin:latest
# reverse-proxy https://headscale.example.com/admin → localhost:8000
The panel authenticates against Headscale with an API key, so mint one:
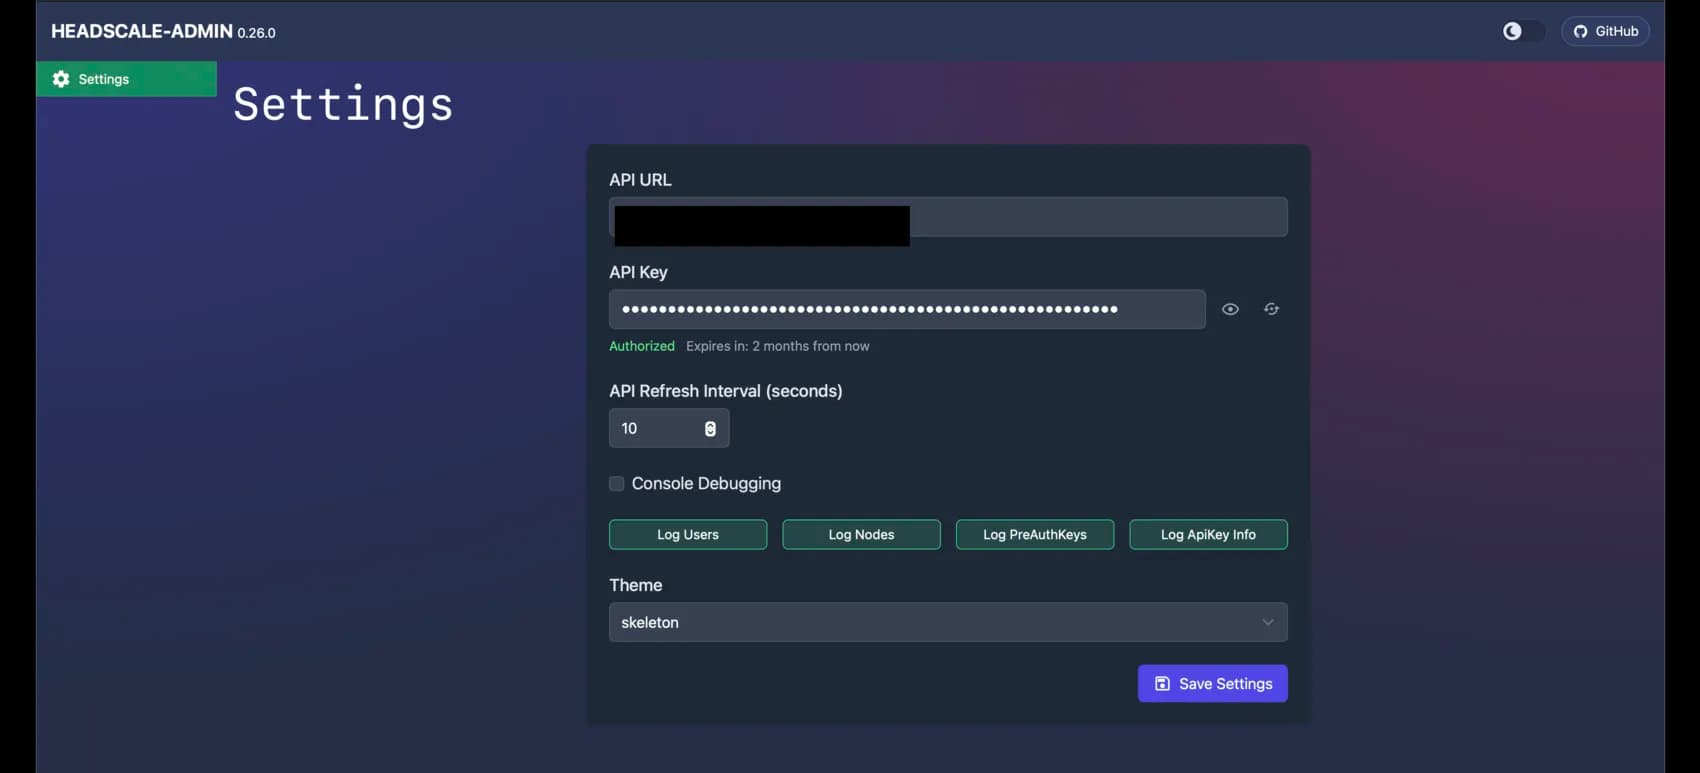
docker exec headscale headscale apikeys create --expiration 90dOpen https://headscale.example.com/admin → Settings, set the API URL to your control server, paste the API key, and save. Once it reads Authorized, you're connected. This is the last time you touch the terminal.
Create a user
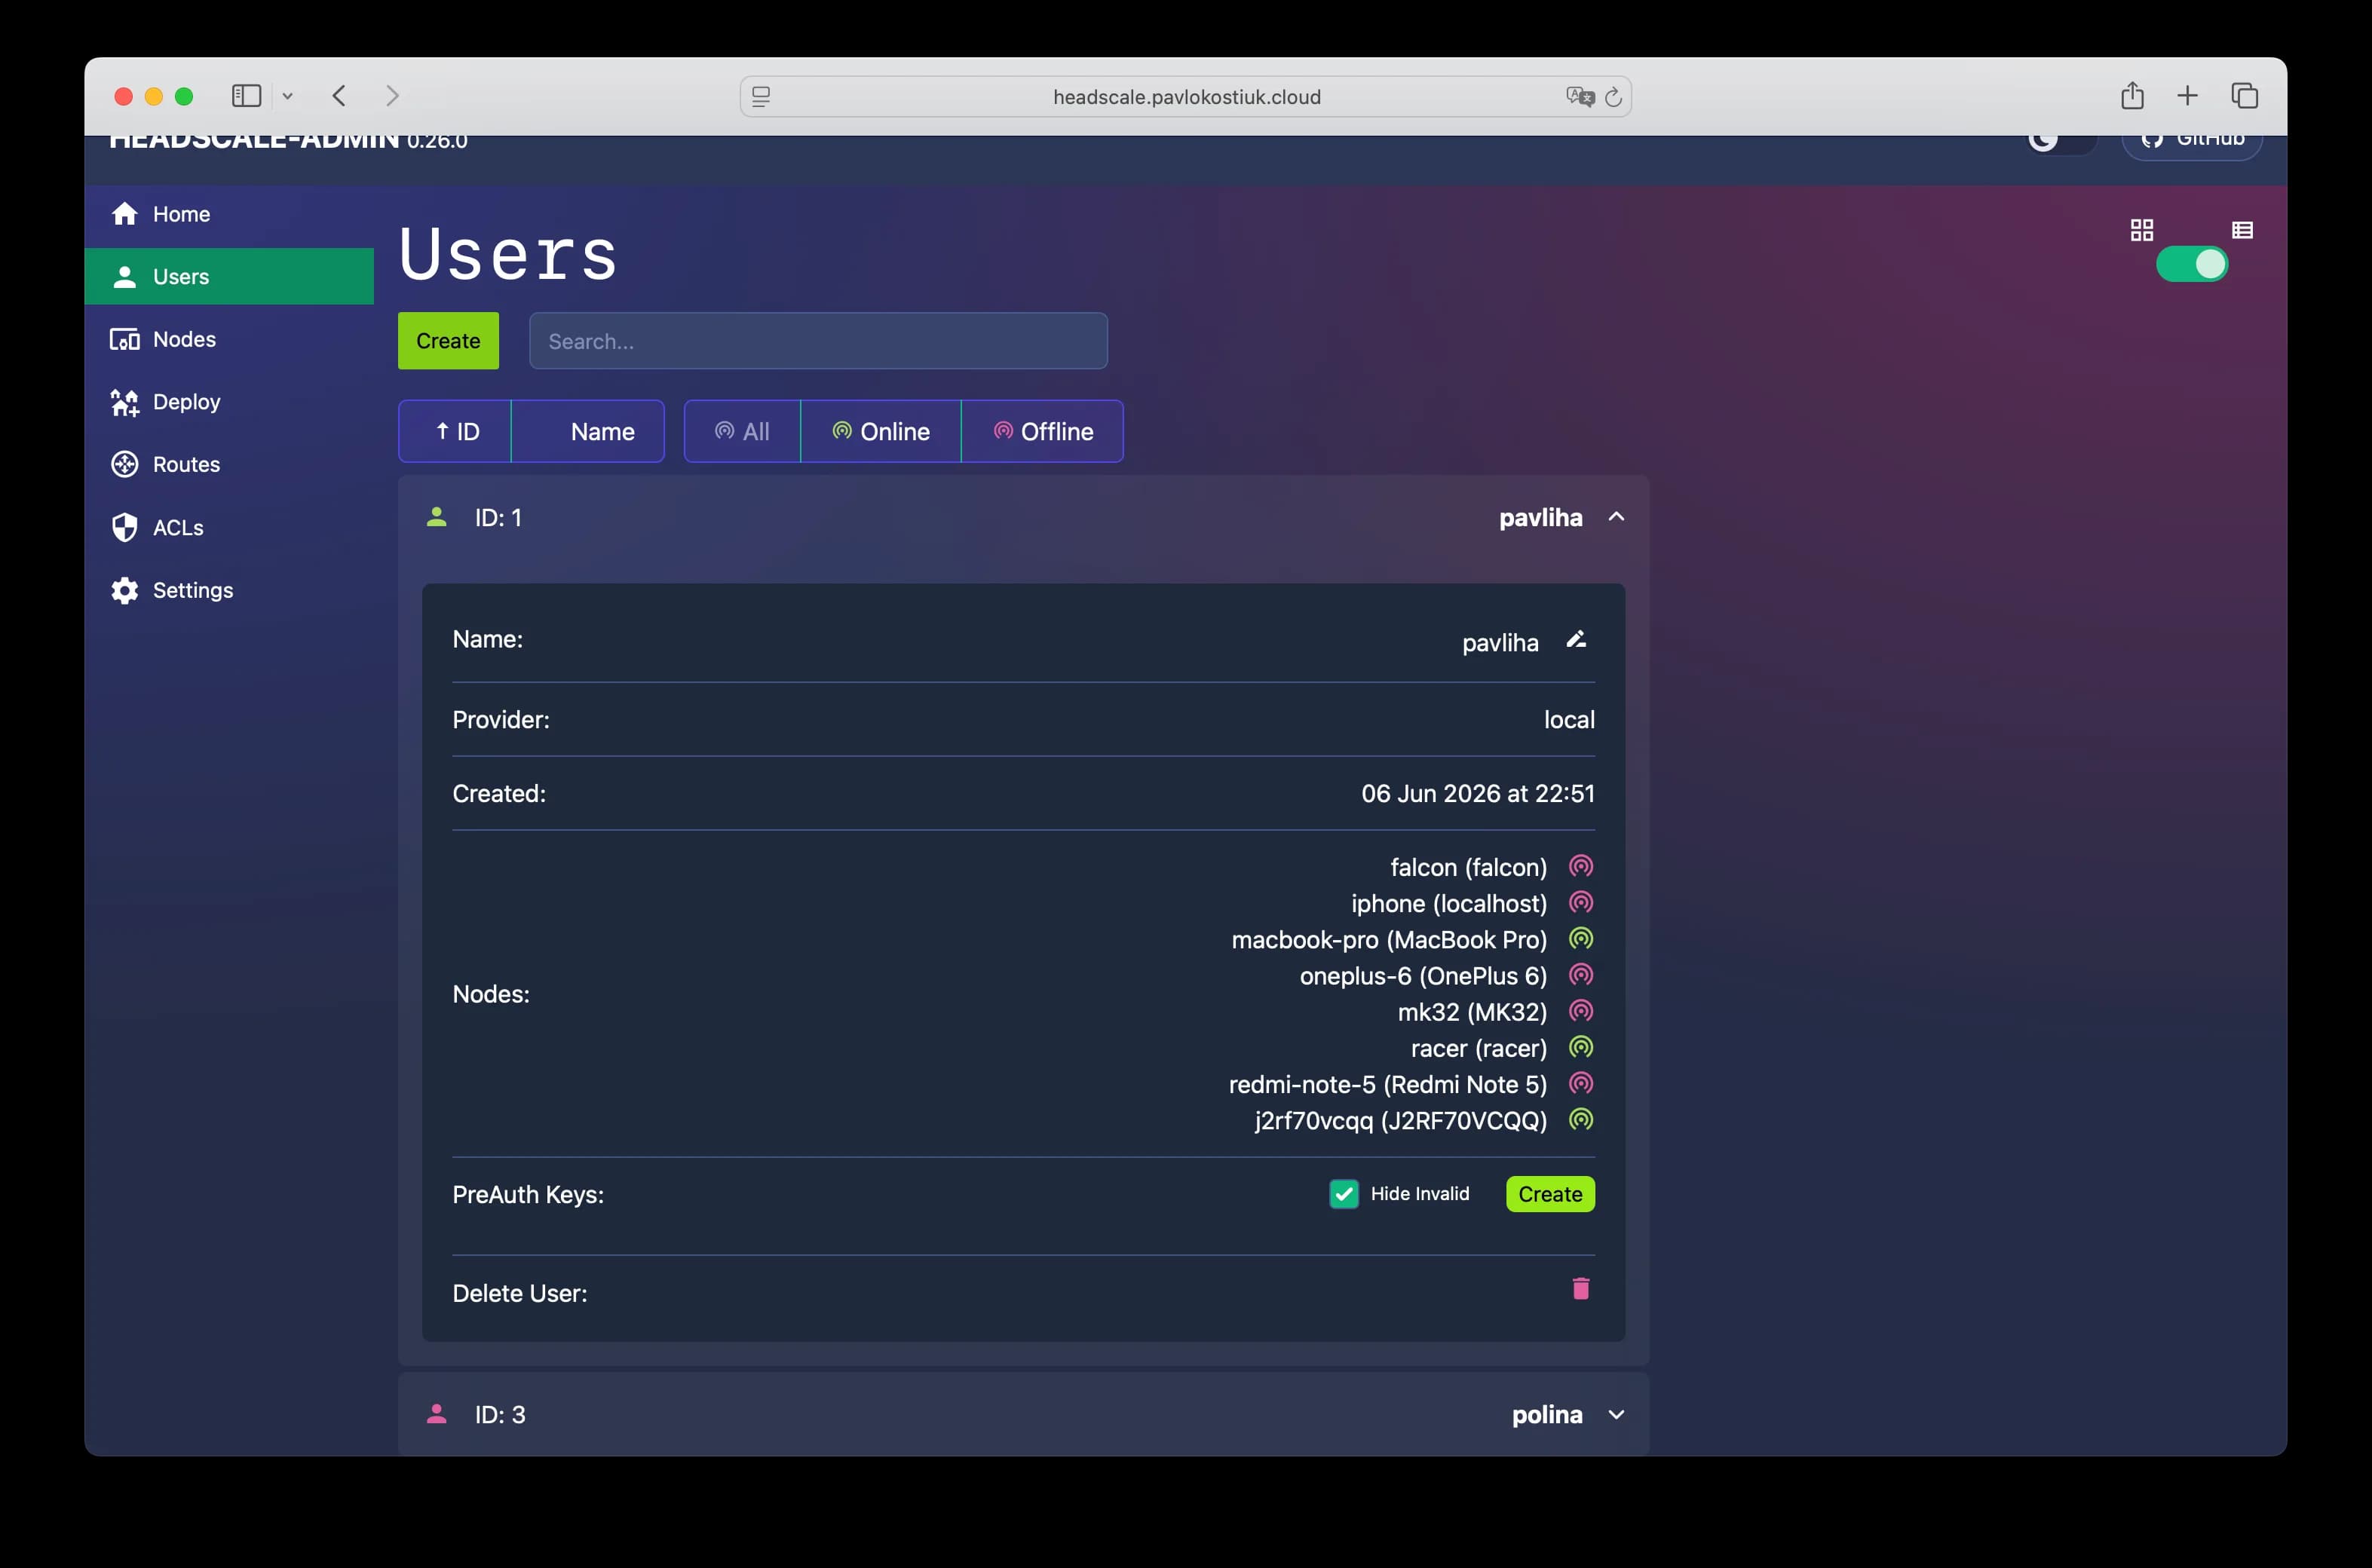
Devices register under a user (a namespace). In the Users tab, click Create and name it. The user's card then lists every node it owns and its pre-auth keys:
Mint a pre-auth key
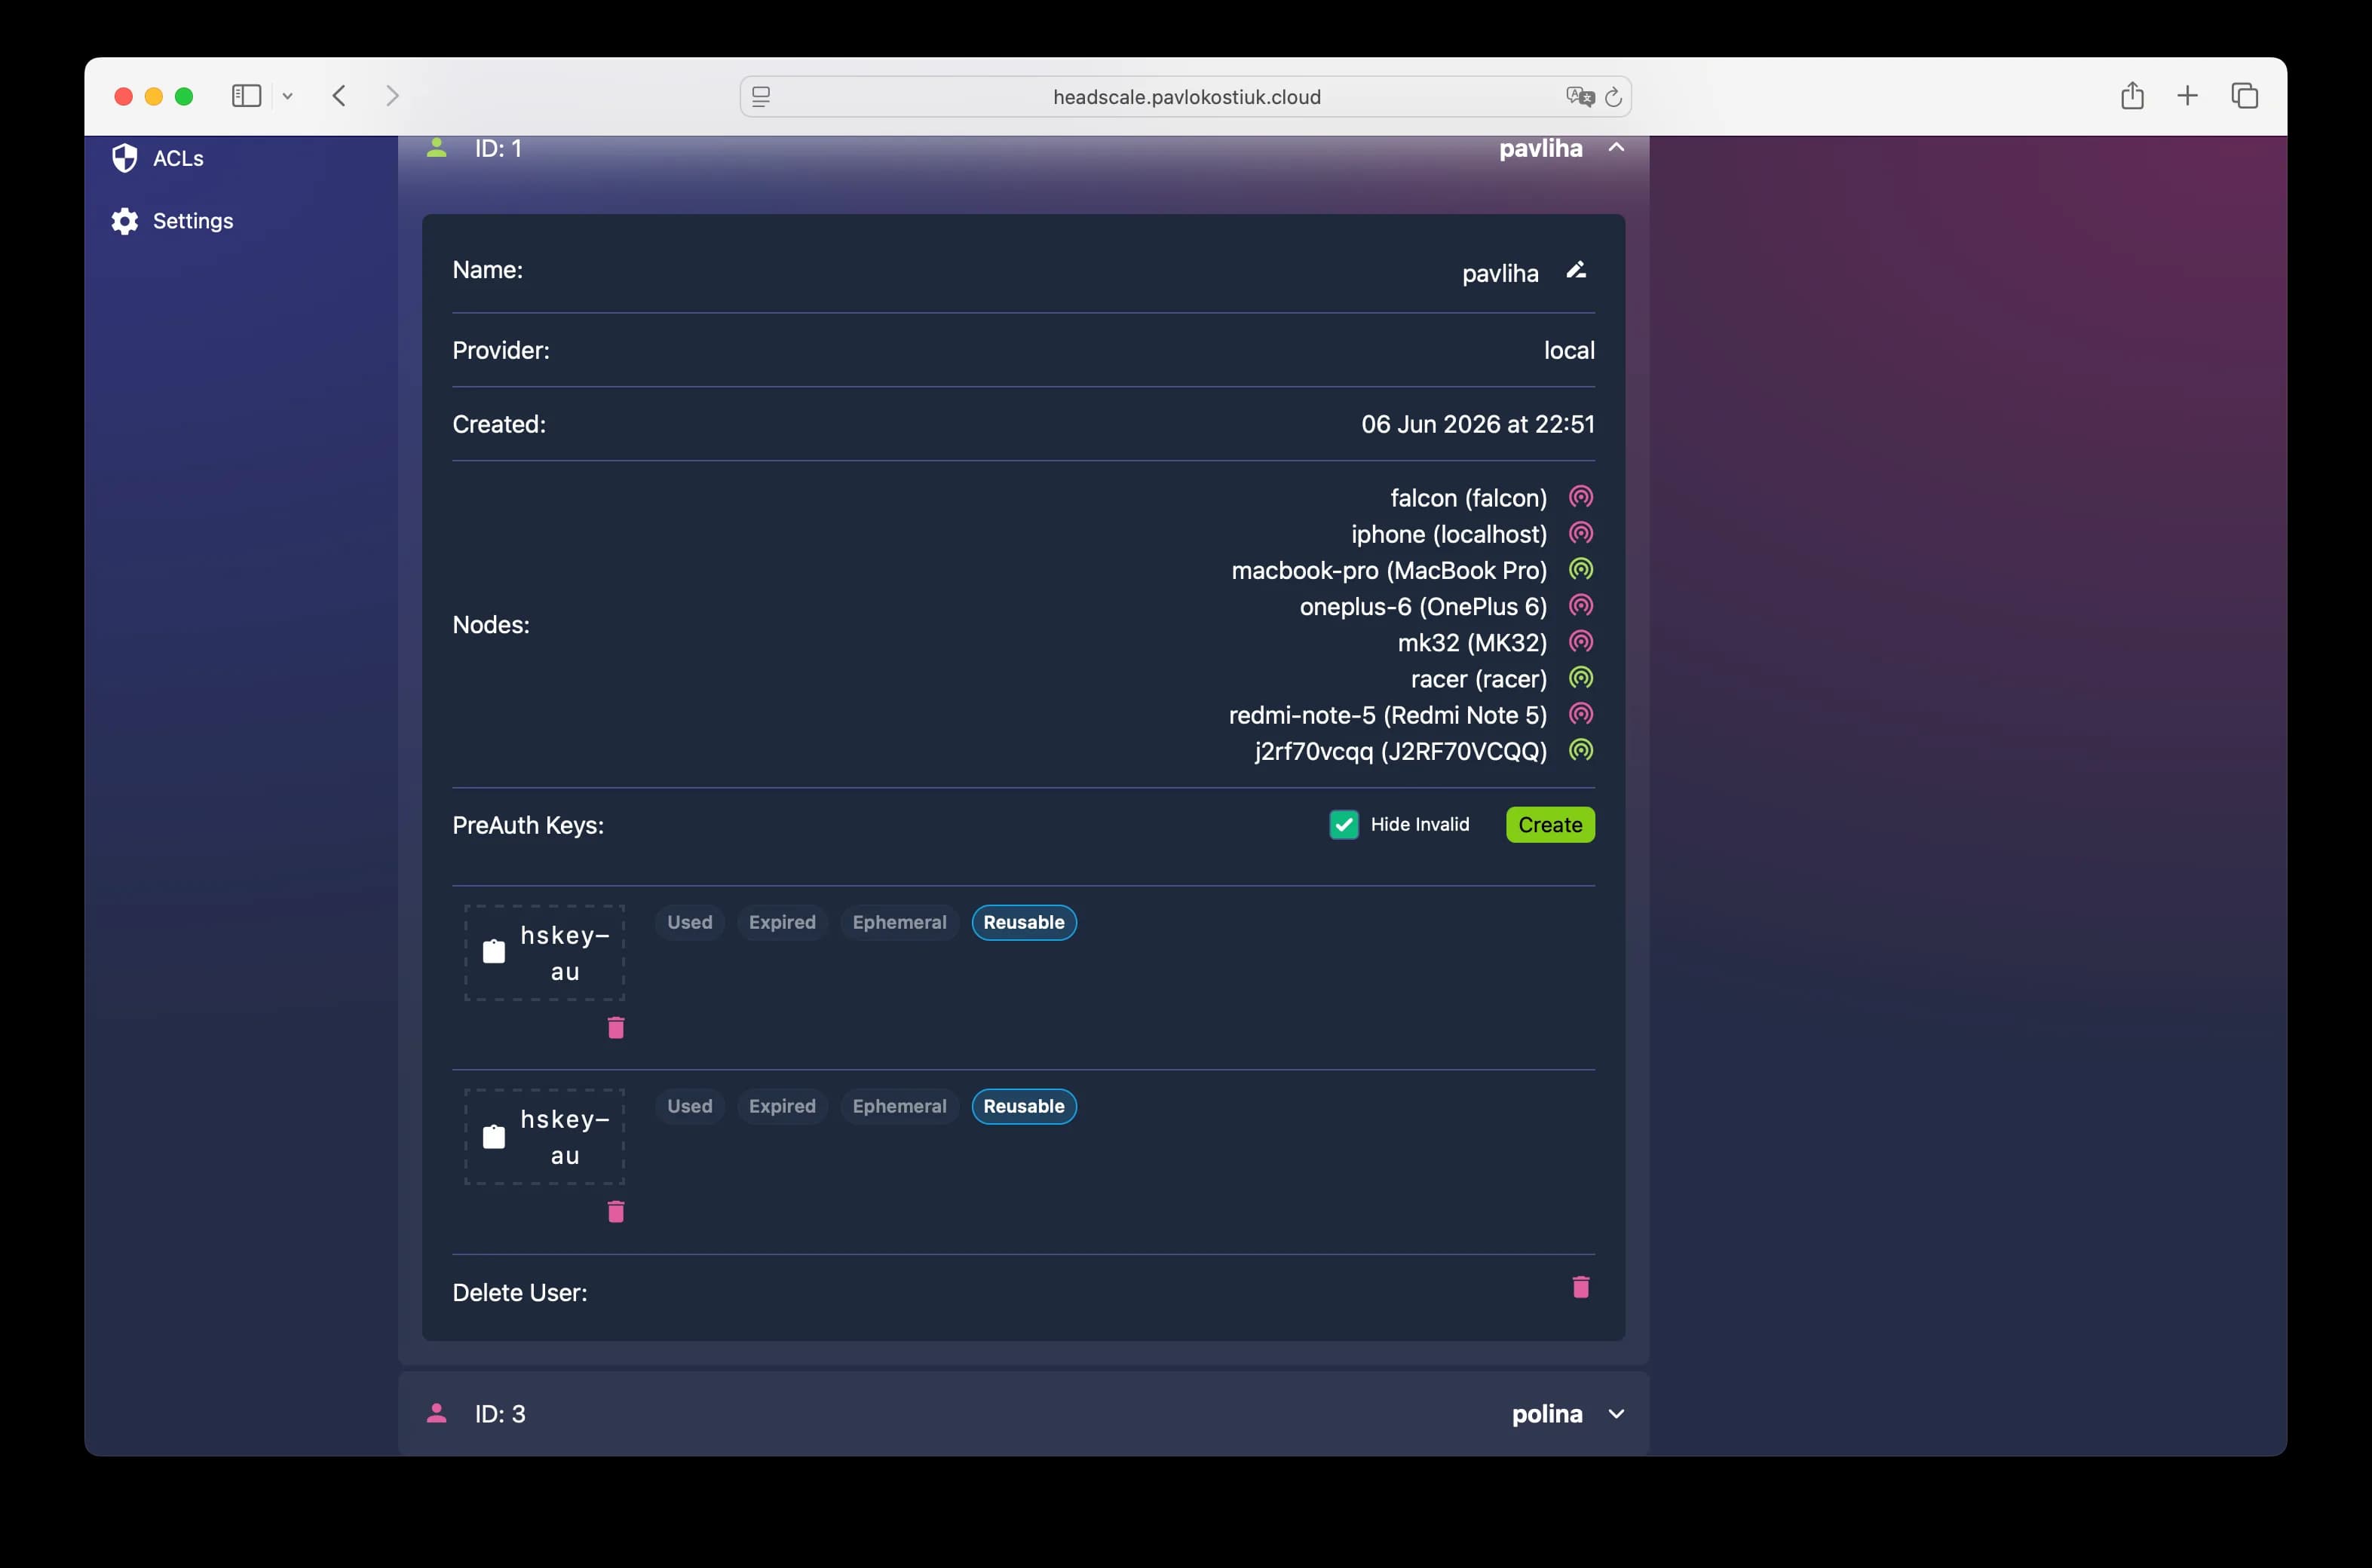
A pre-auth key lets the device join unattended, with no browser sign-in and no manual approval. This is the path Aircast is built around. On the user's card, next to PreAuth Keys, click Create. Copy the hskey-… value, which you'll paste into the device in the next step.
Point the device at your server
Open the device dashboard on your LAN (http://<hostname>.local) and find the Tailscale section. Expand the control-server settings and enter:
- Control server: your URL, e.g.
https://headscale.example.com - Auth key: the pre-auth key from step 4
Save, then Connect (or Switch, if the device is already on another tailnet). The device registers itself against your Headscale and appears under the aircast user within a few seconds, with no approval step.
Confirm it joined
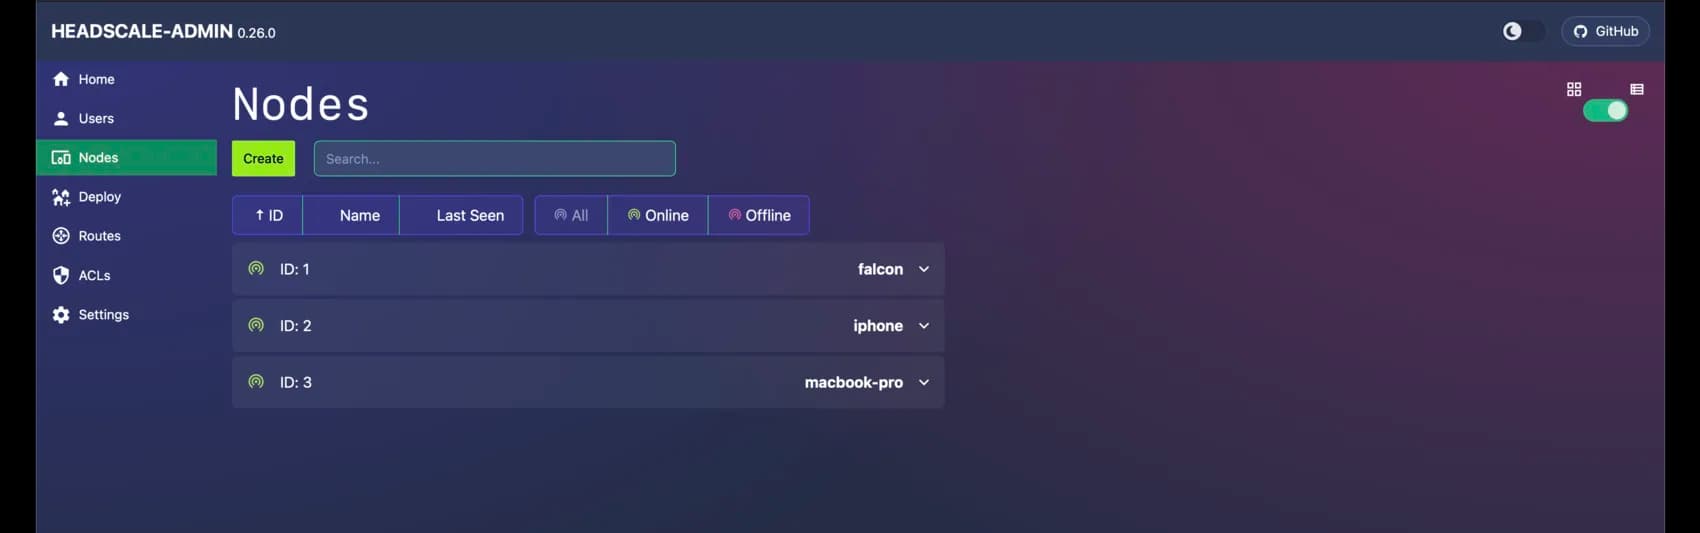
The admin panel's Nodes tab lists every registered device with its online status and tailnet IP. Your Aircast device shows up here alongside any phones or laptops on the tailnet. The device dashboard's Tailscale section now reads Connected with its tailnet name, and you can reach it at that address from anywhere on the same tailnet.
Join your viewing devices
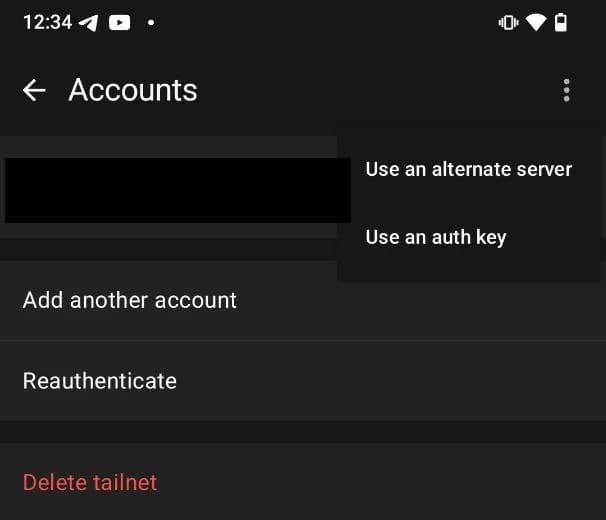
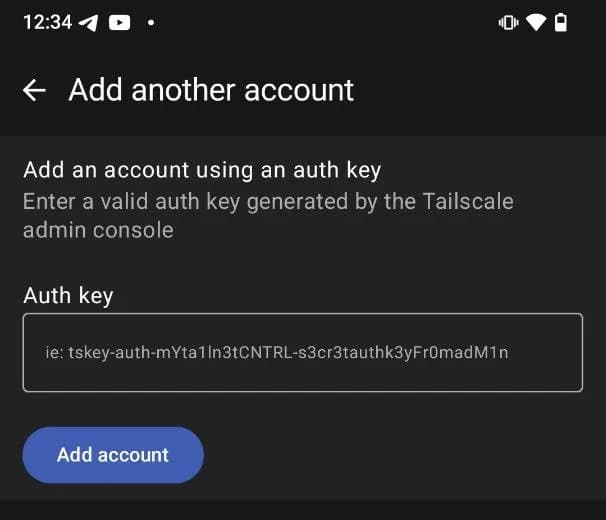
To watch the stream, the device you view from, a phone or laptop, also needs to be on your tailnet. In the official Tailscale app, add an account with Use an alternate server and enter your Headscale URL, and the app signs in against your control plane instead of Tailscale's.
On a phone, open the account menu and pick Use an alternate server:
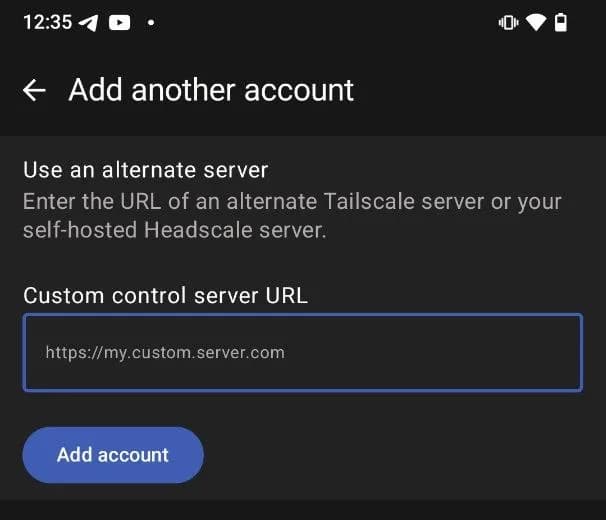
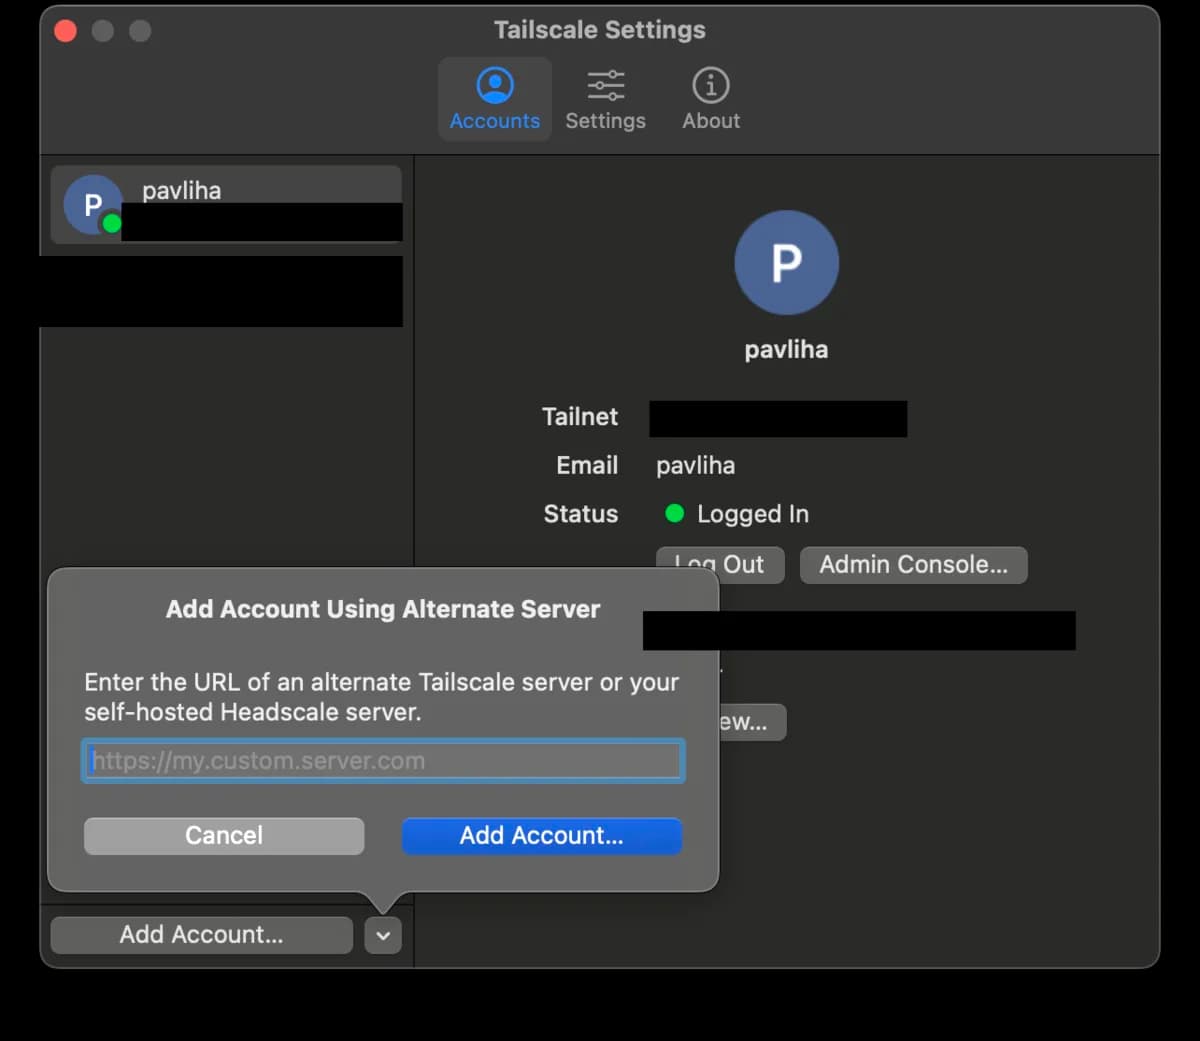
On macOS or desktop it's the same: Add Account → Use an alternate server, then enter your Headscale URL:
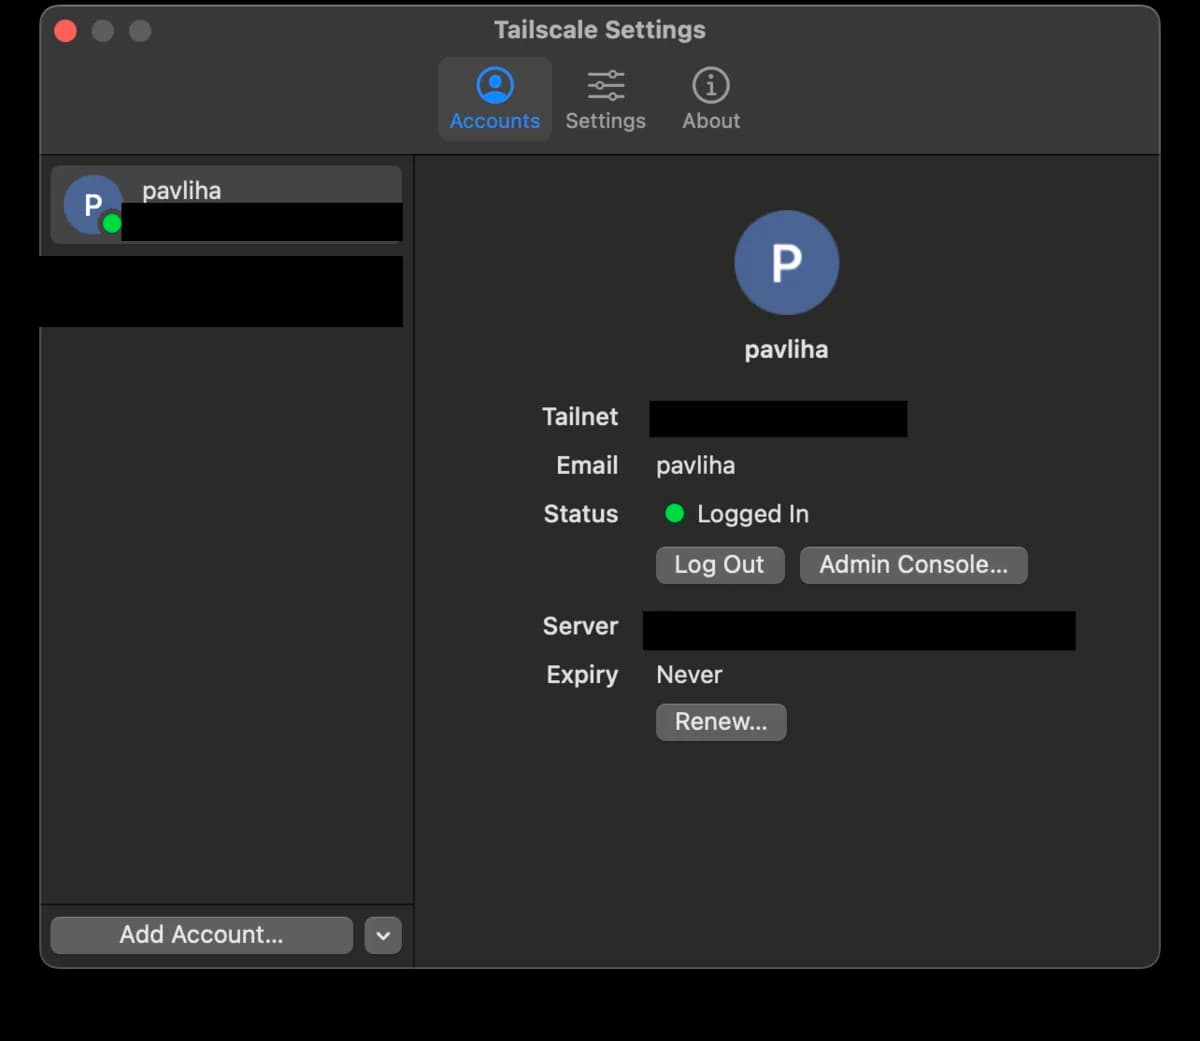
Once it connects, the account's Server shows your Headscale URL, confirming the device is on your control plane, not Tailscale's:
Joining unattended (CLI, or a machine without a browser)? tailscale up --login-server https://headscale.example.com --authkey <pre-auth key>, the app's Use an auth key option does the same.
Connect QGroundControl over the tailnet
With both ends on the tailnet, your ground station reaches the device by its tailnet address, with no port forwarding, no public exposure. In QGroundControl, wire up telemetry and video to the device's tailnet IP/hostname.
Telemetry (MAVLink)
Open Application Settings → Comm Links → Add. Create a UDP link and add a server address pointing at the device's tailnet IP on the MAVLink port, typically <device-tailnet-ip>:14550:
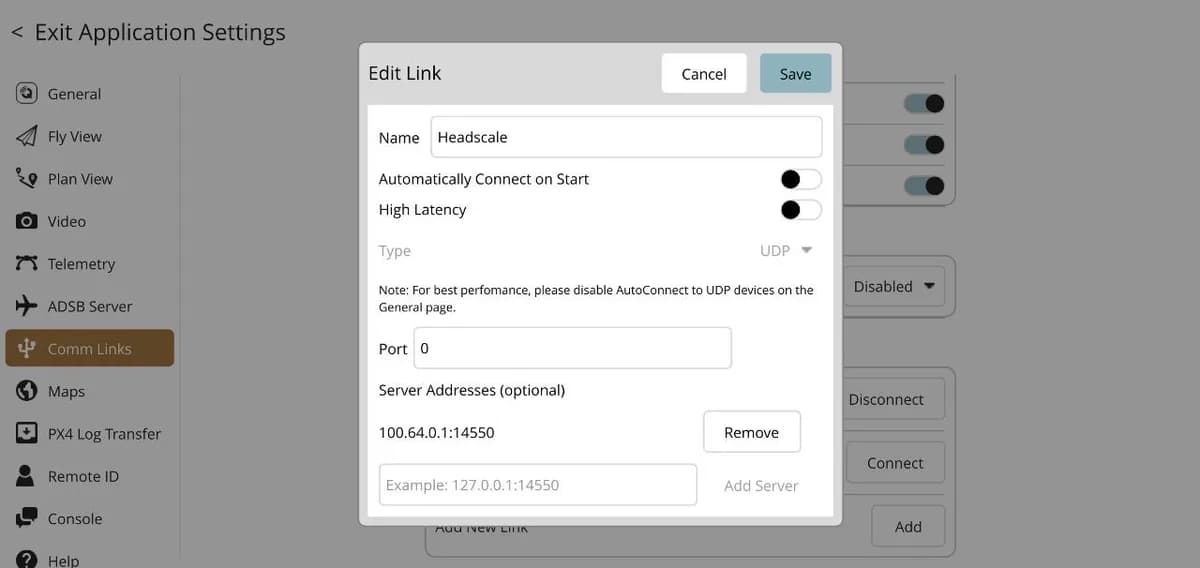
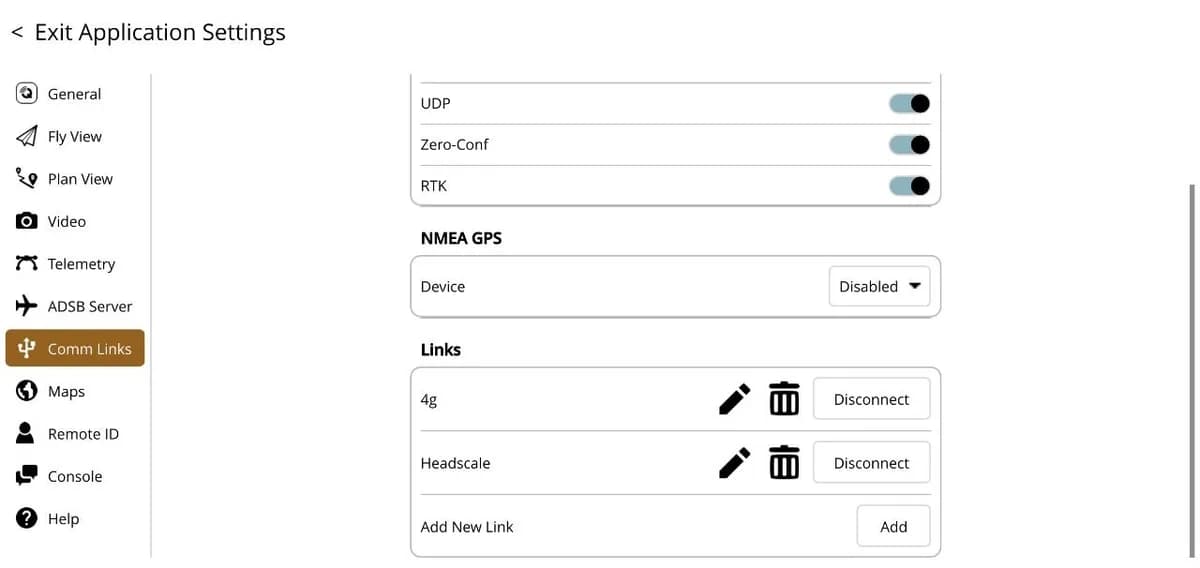
Save it, then Connect: it sits alongside any other links (e.g. a direct 4G link) so you can switch between paths:
Video (RTSP)
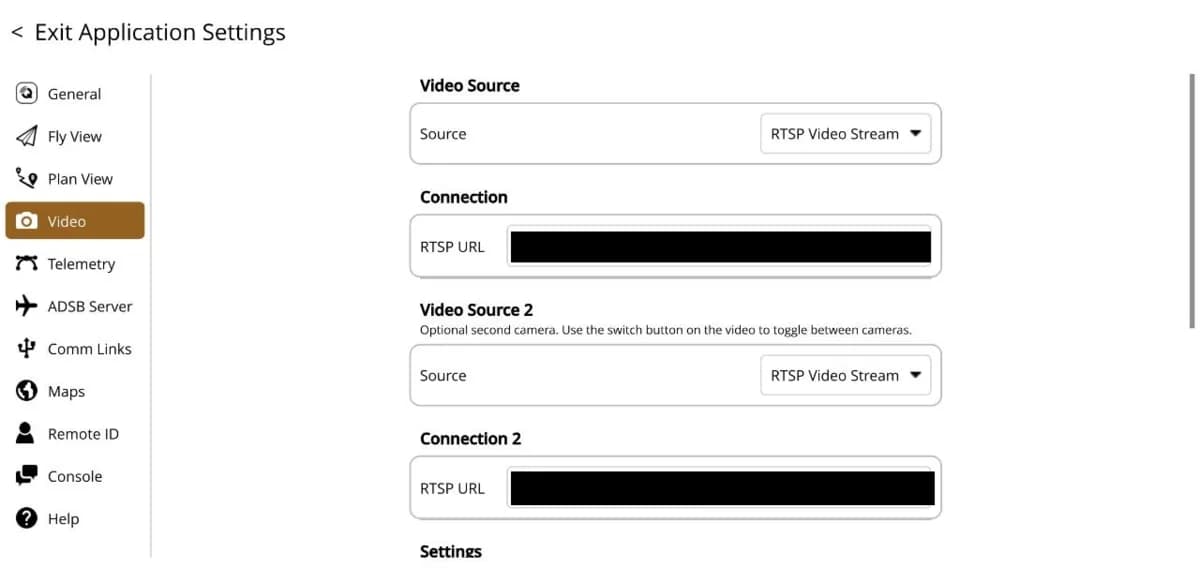
Under Application Settings → Video, set the source to RTSP Video Stream and the URL to the device over the tailnet: rtsp://<device-tailnet-host>:8554/cam. A second source lets you toggle between cameras.
Troubleshooting: “key hex string doesn't have expected type prefix mkey:”
mkey: to copy, no Create form and no approval. Use the manual flow below only if you specifically want to approve each node by hand.If you do register a node through headscale-admin's Create form, you'll hit this error when you paste a key without its mkey: prefix. The field wants the full prefixed key, not the bare hex.
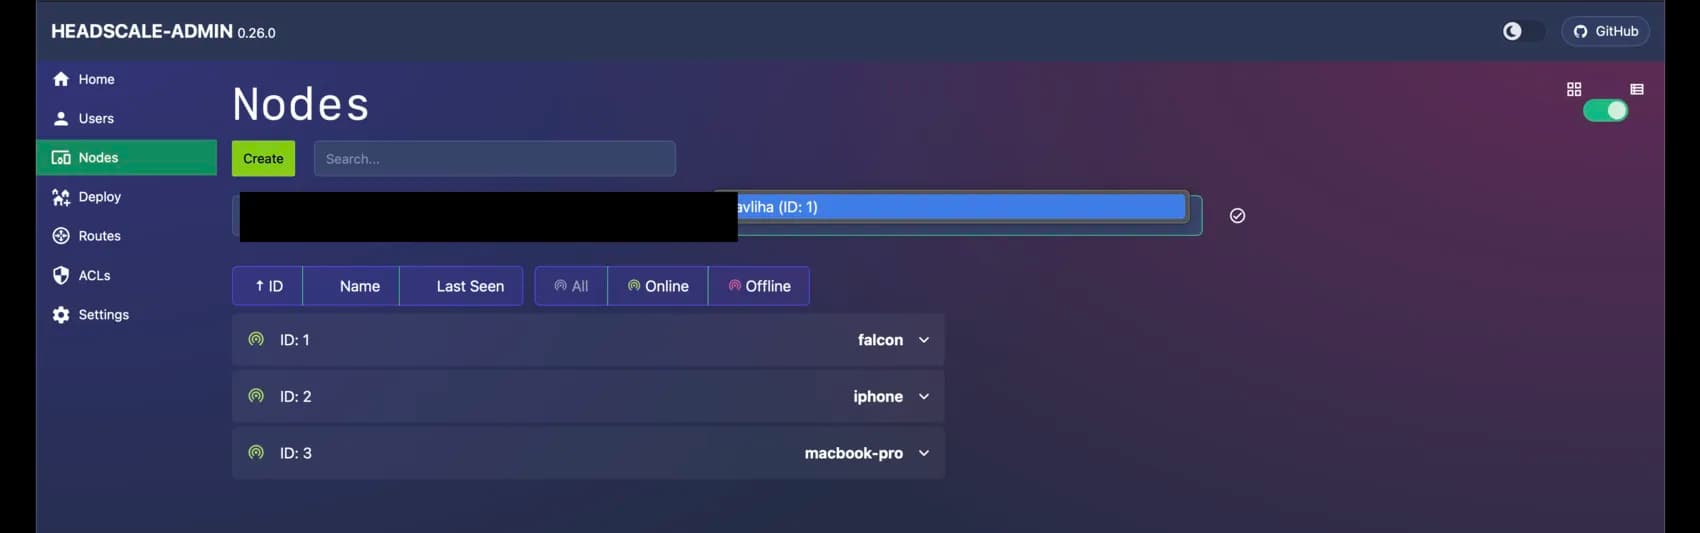
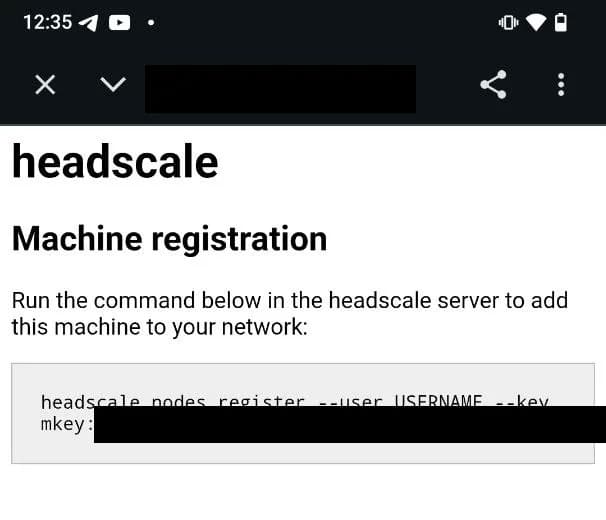
Where does the key come from? A node can't be created from a hostname. It only exists once the device starts registration, which is what generates its machine key. When a client signs in to a self-hosted Headscale interactively, it shows a Machine registration page with a ready-to-run command. The value after --key, including the mkey: prefix, is exactly what the form expects.
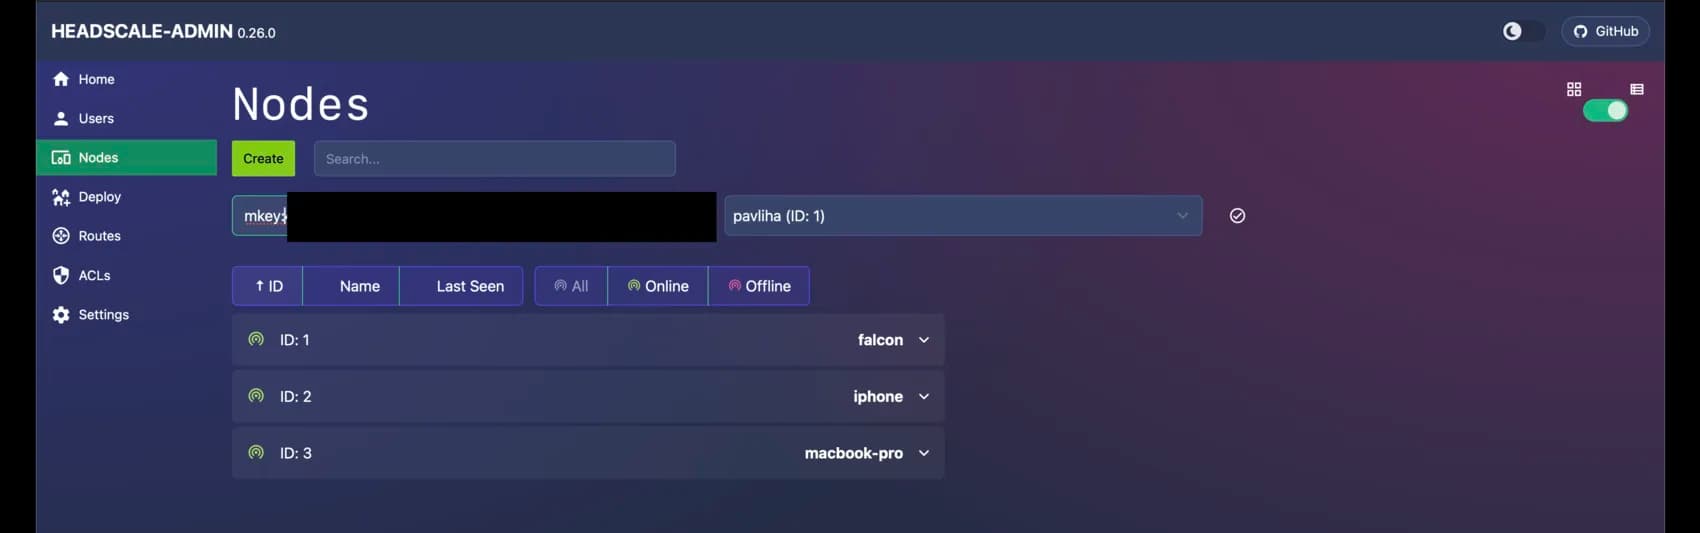
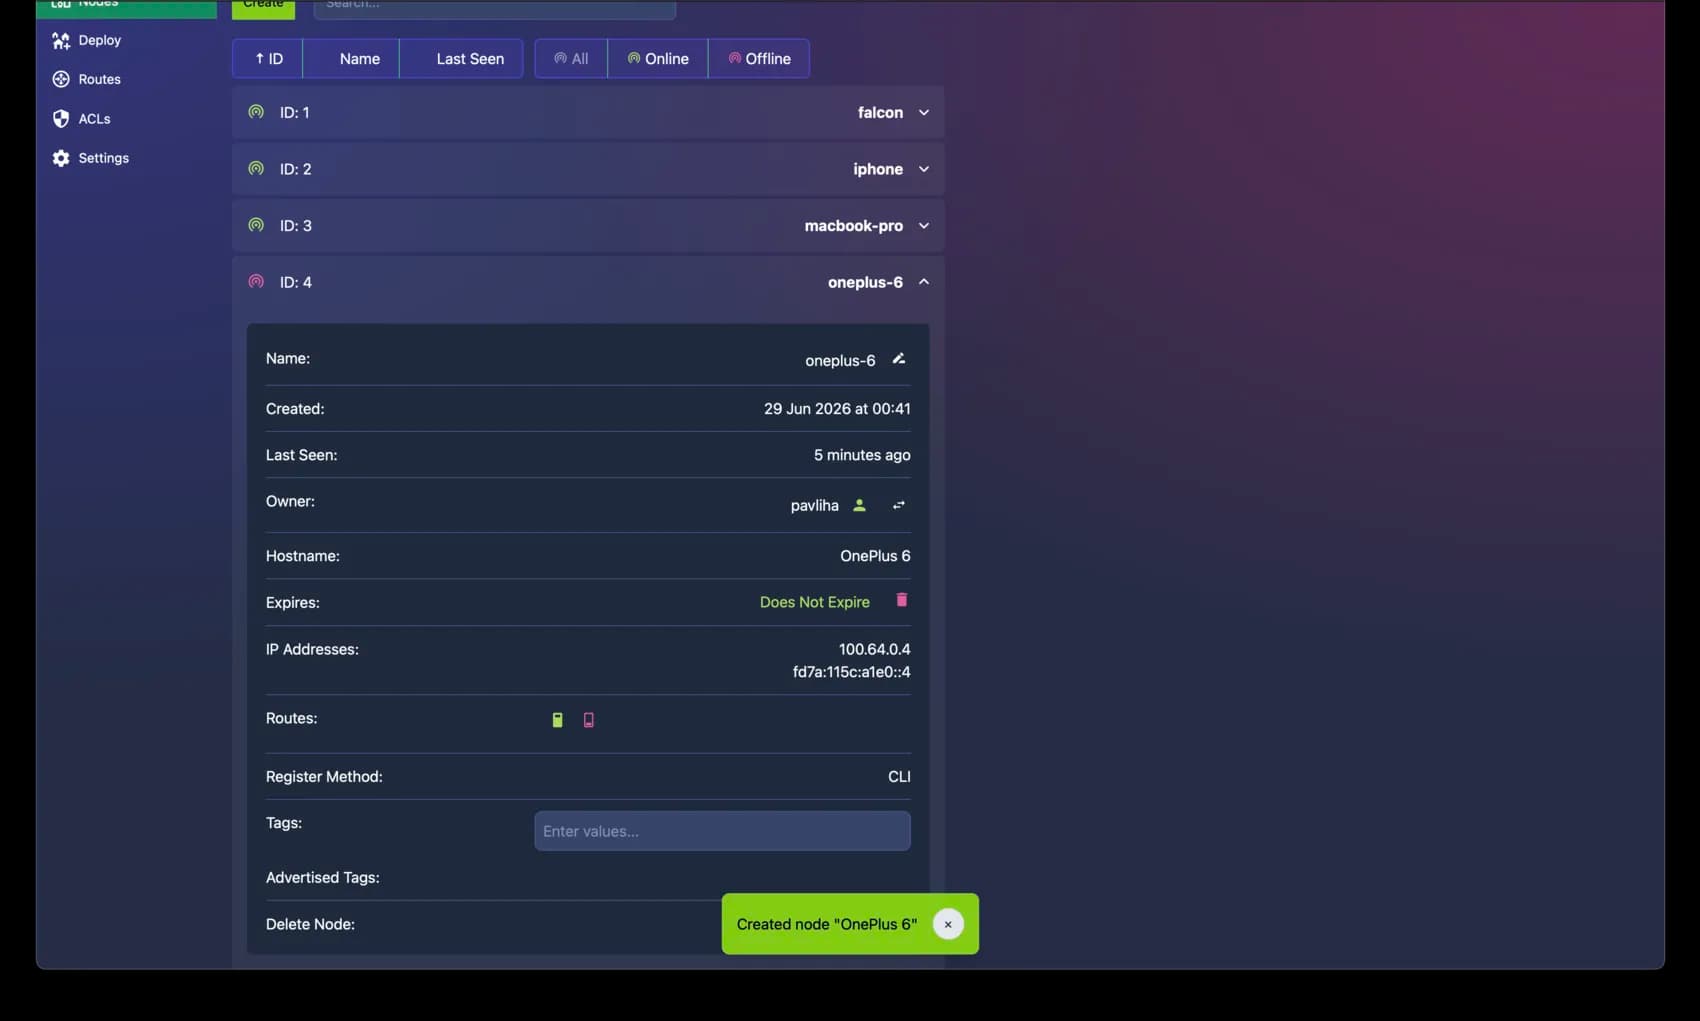
Paste that full mkey:-prefixed value into the Create form, pick the user, and submit. The node registers cleanly.
Flash your Pi in about 5 minutes
The Aircast Flasher downloads the image, sets Wi-Fi and hostname, and verifies the card.
On This Page